Spring HVAC maintenance is essential not only for enhancing system efficiency but also for extending its lifespan. This preventive care can ward off unexpected breakdowns, ensuring your home remains comfortable as temperatures begin to rise.
Essentials of Spring HVAC Maintenance
Spring marks a time for homeowners to focus on the health and efficiency of their HVAC systems. As the transition from cold to warmer weather begins, certain key components of your HVAC system need attention to ensure it runs smoothly and efficiently throughout the warmer months.
This proactive maintenance is vital to prevent potential issues that could lead to costly repairs and downtime when you need cooling the most.
Key Components of Spring HVAC Maintenance:
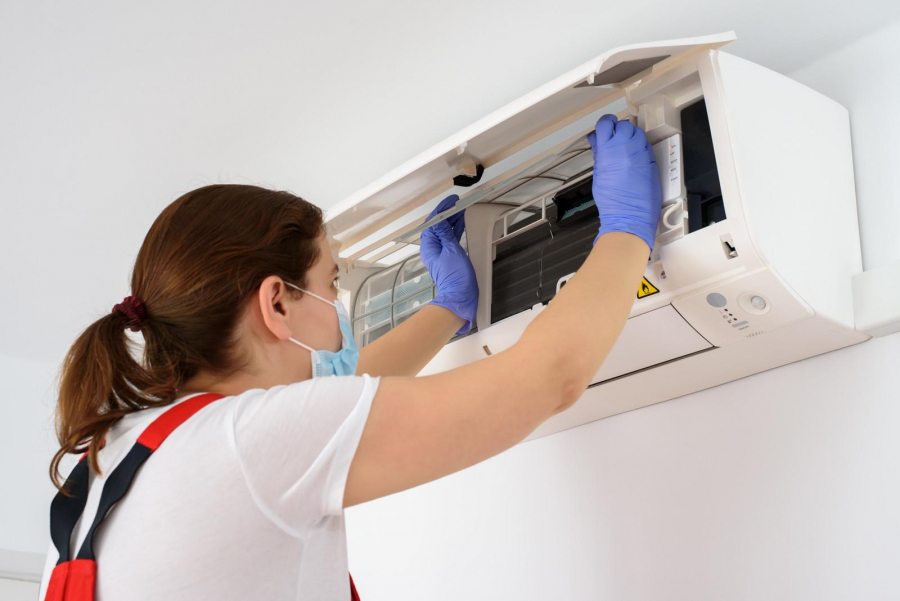
- Air Filter Replacement
Starting with the basics, replacing or cleaning your air filters is crucial. Clean filters ensure optimal airflow, improve indoor air quality, and help maintain the system’s efficiency. - System Calibration
Checking and calibrating the HVAC thermostat ensures the system operates at the ideal temperature settings for spring, optimizing comfort and efficiency. - Coil Cleaning
Both the evaporator and condenser coils are prone to dirt and debris buildup, which can inhibit their efficiency. Cleaning these coils is essential for maintaining their function and preventing overworking the system. - Inspecting Drainage Lines
Spring showers can lead to increased humidity levels, which your HVAC system must handle efficiently. Checking and clearing the condensate drain line ensures that excess moisture is properly diverted away from your HVAC system, preventing mold growth and water damage. - Checking Refrigerant Levels
Adequate refrigerant levels are crucial for effective cooling. A professional inspection to check for leaks and recharge the refrigerant can avoid inefficiencies or potential damage to the compressor.
Benefits of Regular Spring HVAC Maintenance
Regular spring HVAC maintenance of your HVAC system brings a multitude of benefits, crucial for both efficiency and comfort. By keeping up with scheduled maintenance, your system operates at peak efficiency, which minimizes the energy required for heating and cooling your home, subsequently lowering your energy bills. This routine care not only tackles wear and tear early but also extends the lifespan of your HVAC components, staving off the need for costly replacements down the line.
Moreover, the quality of air inside your home significantly improves with regular maintenance. Clean filters and a well-maintained system reduce the presence of pollen, dust, and other allergens, which is especially beneficial during the allergy-prone spring season. By embracing these essential maintenance tasks, you ensure your home remains a comfortable haven as temperatures start to rise, providing a season of uninterrupted comfort and efficiency.
Filter Maintenance
One of the most crucial and straightforward aspects of spring HVAC maintenance is the management of your system's air filters. Filters play a pivotal role in maintaining the efficiency and longevity of your HVAC unit by trapping dust, pollen, and other airborne particles. Regularly replacing or cleaning these filters is essential for several reasons.
The primary function of HVAC filters is to purify the air that circulates through your heating and cooling system, ensuring it is free from contaminants that can harm your health and the system itself. When filters become clogged with debris, the system must work harder to push air through, leading to decreased efficiency and increased wear on its components. This not only raises your energy costs but can also shorten the lifespan of the system.
The frequency at which you should change your filters can vary based on several factors, including the type of filter, the air quality in your area, whether you have pets, and the number of people living in your home. However, a general guideline for filter maintenance is:
- Standard Filters: Replace these every 30 to 90 days.
- Pleated Filters: These are designed to last a bit longer, generally up to 90 days.
- High-Efficiency Filters: Depending on the manufacturer's recommendations, these can last between 6 to 12 months.
In households with pets or residents with allergies, it might be necessary to change filters more frequently to maintain optimal air quality. Similarly, during high pollen seasons like spring, more frequent changes can help alleviate allergy symptoms.
System Calibration
Proper calibration of your HVAC system's thermostat is a critical step in preparing for the warmer months of spring. It ensures that your heating and cooling system operates efficiently and maintains the ideal temperature settings for your comfort.
Calibrating your thermostat involves adjusting its settings to ensure the temperature inside your home matches the set values. A properly calibrated thermostat helps prevent discrepancies that can cause your HVAC system to run longer than necessary, leading to unnecessary energy consumption and increased wear on system components.
STEPS FOR EFFECTIVE THERMOSTAT CALIBRATION
-
Check Current Settings: Begin by checking the existing settings on your thermostat. Make sure it is programmed to match your daily schedule and comfort preferences.
-
Measure Temperature Accuracy: Use a separate thermometer to verify the accuracy of the thermostat. Place it near the thermostat and compare readings. If there is a significant difference, recalibration may be needed.
-
Adjust Calibration Settings: If you notice discrepancies between the actual temperature and what your thermostat is reading, consult your thermostat’s manual to adjust its calibration settings. This might involve adjusting a screw or dial on the unit, or recalibrating through a digital menu.
-
Consider Upgrading: If your thermostat is consistently inaccurate or lacks programmable features, consider upgrading to a newer, smart thermostat. These devices offer finer control over your HVAC system, learning your preferences and adjusting automatically to save energy while maintaining comfort.
-
Regular Checks: Regularly check and recalibrate your thermostat as part of ongoing HVAC maintenance. This ensures it remains accurate and responsive to changes in your home environment.
Coil Cleaning for Optimal Efficiency
Maintaining the cleanliness of the evaporator and condenser coils in your HVAC system is critical for ensuring its efficiency and longevity. These coils are responsible for the heat exchange process that cools and heats your home, and when they are clogged with dirt and debris, the system's performance can significantly decline.
STEPS TO CLEAN EVAPORATOR AND CONDENSER COILS
-
Turn Off the Power: Safety first—ensure the system is completely powered off before you begin any maintenance.
-
Access the Coils: For the evaporator coil, you will usually find it inside the air handler. The condenser coil is located in the outdoor unit. Remove any protective panels to access the coils.
-
Inspect and Remove Debris: Use a soft brush to gently remove any loose debris from the coils. This can include leaves, dirt, and other outdoor elements for the condenser coil, and dust or pet hair for the indoor evaporator coil.
-
Apply Coil Cleaner: Use a commercial coil cleaner that is appropriate for the type of coils you are cleaning. Follow the manufacturer’s instructions carefully. Spray the cleaner evenly across the coil and let it sit for the time specified on the cleaner’s label.
-
Rinse the Coils (if required): Some cleaners will require rinsing with water after application. If so, gently spray the coils with water ensuring not to damage any delicate fins or components.
-
Check and Straighten Fins: Both types of coils have fins that can bend and block airflow. Carefully straighten any bent fins with a fin comb or appropriate tool.
-
Reassemble and Restore Power: Once the coils are dry and clean, replace any protective panels and restore power to the unit.
Inspecting Drainage Lines
The arrival of spring not only brings warmer temperatures but also increased humidity and rainfall. These conditions can challenge your HVAC system, particularly in efficiently handling moisture. An essential aspect of maintaining your system’s health is ensuring the condensate drain line is clear and functioning correctly.
The condensate drain line plays a vital role in your HVAC system by channeling excess moisture away from the system. This moisture is a byproduct of the air conditioning process, where warm air is cooled and humidity is condensed. A clogged or malfunctioning drain line can lead to water backing up, potentially causing water damage to your home or promoting mold and mildew growth.
STEPS FOR INSPECTING AND CLEARING HVAC DRAINAGE LINES
-
Locate the Condensate Drain Line: This is typically a PVC pipe located near your indoor air handling unit. It usually drains outside near the foundation of your home.
-
Visual Inspection: Check for any obvious signs of blockage or leaks in the pipe. Look for water stains, puddles, or mold growth around the area where your drain line exits the house.
-
Clear Blockages: If you suspect a blockage, use a stiff wire to gently clear out the drain line. For more stubborn clogs, flushing the line with a mixture of water and vinegar can help break down debris. Always be gentle to avoid damaging the pipes.
-
Check the Drain Pan: Inspect the drain pan located under your HVAC unit for standing water, which can indicate a clogged drain line. Clean the pan thoroughly and treat it with an anti-algal agent to prevent future growths.
-
Test the Flow: After clearing the line, pour water into the drain pan to ensure it flows freely through the condensate line. This simple test can confirm the line is clear and functioning properly.
-
Annual Professional Check: While homeowners can perform basic checks and maintenance, it's wise to have your HVAC system professionally inspected annually. This typically includes a thorough check of the drainage system to ensure it is free from obstructions and operating efficiently.
Checking Refrigerant Levels
Maintaining the correct refrigerant level in your HVAC system is pivotal for effective cooling. Refrigerant is the lifeblood of any air conditioning system, responsible for absorbing heat from the indoor air and releasing it outside. When the refrigerant level is not optimal, your HVAC system can't cool efficiently, leading to increased energy costs and potential system damage.
Proper refrigerant levels ensure that your air conditioning system operates at peak efficiency. Low refrigerant levels can cause the system to work harder than necessary, which not only increases energy consumption but can also lead to premature wear and tear on the compressor, potentially resulting in costly repairs.
STEPS FOR PROFESSIONAL REFRIGERANT INSPECTION AND MANAGEMENT
-
System Inspection: A certified HVAC technician should begin with a thorough inspection of the system to check for signs of refrigerant leakage, which can occur due to loose connections, corrosion, or damage to the refrigerant lines.
-
Leak Detection and Repair: If a leak is detected, it must be repaired before adding more refrigerant. Technicians use specialized tools to find leaks and make necessary repairs to ensure the system is sealed and secure.
-
Refrigerant Recharge: Once any leaks are repaired, the technician will recharge the system with refrigerant. The type and amount of refrigerant must match the specifications for your system, as stipulated by the manufacturer.
-
Testing System Performance: After the refrigerant levels are adjusted, the technician will test the system to ensure it is cooling effectively and efficiently. This includes monitoring the system’s pressure and temperature readings to verify they align with recommended levels.
-
Regular Monitoring: Homeowners are encouraged to monitor their system and note any changes in cooling efficiency or unusual noises, which could indicate refrigerant issues or other problems.
Professional HVAC Inspections and Tune-ups
Spring is an ideal time for a professional HVAC inspection. After a long winter, having an expert assess and tune up your system ensures it operates at peak efficiency for the warmer months ahead. This not only enhances the comfort of your home but also extends the lifespan of your HVAC equipment.
A professional inspection can identify potential issues that might not be noticeable to the untrained eye. Technicians look for wear and tear, mechanical problems, and other inefficiencies that could lead to costly repairs if left unchecked. By catching and addressing these issues early, homeowners can avoid unexpected breakdowns during peak usage times, ensuring consistent comfort and reliability.
What Homeowners Can Expect During a Spring Tune-up
-
Thorough Cleaning: Beyond what homeowners might do themselves, technicians perform a deep clean of coils, blower components, and other internal mechanisms, removing debris that can impede airflow and efficiency.
-
Safety Checks: Inspections include checks on electrical connections and controls to ensure they are operating safely. This is crucial for preventing electrical hazards and ensuring the system is not at risk of short circuits or other electrical issues.
-
Refrigerant Level Check: Proper refrigerant levels are essential for your HVAC to cool your home effectively. A technician will check these levels and refill if necessary, also looking for signs of leaks, which can be detrimental to system performance and the environment.
-
Efficiency Evaluation: Technicians evaluate the efficiency of the HVAC system to ensure it meets energy standards and is not costing more in energy bills than it should. Adjustments and calibrations are made to optimize performance.
-
Filter Replacement: Although homeowners can replace filters themselves, a professional will check the filter and replace it if needed, ensuring the correct type and fit for optimal air quality and flow.
-
Ductwork Inspection: Checking the ductwork for leaks, blockages, or damage is another critical component of a professional tune-up. Properly sealed and unobstructed ducts are essential for efficient system operation.
-
System Testing: After completing their checklist, technicians will run the system to ensure it is operating smoothly and efficiently. This test helps identify any additional issues that need correction.
Benefits of a Spring HVAC Tune-up
Investing in a professional HVAC inspection and tune-up each spring is a proactive measure that pays off in maintaining a comfortable, safe, and efficient home environment.
- Improved System Performance: Regular professional maintenance ensures your HVAC system operates at optimal efficiency, reducing energy consumption and lowering utility bills.
- Extended Equipment Lifespan: With proper care, HVAC systems can last significantly longer, saving homeowners money on premature replacement costs.
- Enhanced Indoor Air Quality: A well-maintained HVAC system provides better air quality by efficiently filtering out allergens and pollutants, which is especially important during allergy season.
- Peace of Mind: Knowing your HVAC system has been professionally inspected and tuned up provides peace of mind that it will reliably keep you comfortable during the hot months ahead.
Handling Repairs and Preparing for Summer
Addressing repairs early and ensuring your system is ready for the heat can prevent unexpected breakdowns and ensure continuous comfort throughout the season.
Common HVAC Issues and Early Interventions
-
Refrigerant Leaks: Low refrigerant levels can significantly decrease the efficiency of your air conditioning system, leading to higher energy costs and insufficient cooling. Identifying and repairing leaks early is crucial for maintaining performance and preventing damage to the compressor.
-
Faulty Thermostat: Sometimes the issue might be as simple as a malfunctioning thermostat. If your HVAC system isn't responding correctly to the settings, it might be time to check for wiring issues or consider upgrading to a more reliable, programmable thermostat.
-
Dirty or Clogged Filters: One of the most common and easily overlooked problems is a dirty filter. Clogged filters restrict airflow, strain the HVAC system, and worsen air quality. Regularly replacing or cleaning filters is a simple step that can prevent these issues.
-
Worn Contactor or Capacitors: The contactor and capacitors in the outdoor unit play a crucial role in starting the compressor and fans. Signs of wear or electrical issues in these components can cause the system to fail to start or operate efficiently.
-
Obstructed Condenser Unit: The outdoor condenser unit should be clear of debris, leaves, and other obstructions. An obstructed condenser can lead to overheating and reduced cooling efficiency.
Secure Your Comfort with Spring HVAC Readiness
Regular maintenance not only ensures that your HVAC system is running at its best but also prevents unexpected failures and optimizes energy efficiency. This is especially important as we transition from the mild spring to the more demanding summer months.
At The Boiler Shoppe, we are dedicated to ensuring that your HVAC system delivers peak performance and efficiency. Our team of qualified professionals is equipped to handle all aspects of HVAC maintenance, from routine checks to complex repairs, ensuring your system is well-prepared for the heat of summer.
Schedule your spring HVAC maintenance appointment with The Boiler Shoppe. By choosing professional service, you ensure that your system is not only efficient but also prolongs its lifespan.